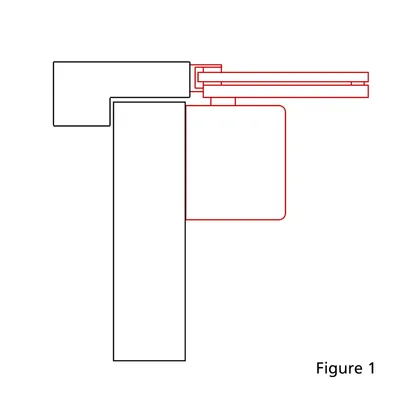
Figure 1
This is the default way of fitting an overhead door closer, where the body of the closer is mounted on the ‘pull’ side of the door. The closer arm, assuming that they are the scissor type rather than a slide arm, will project at roughly 90 degrees to the door and be mounted to the door lining.
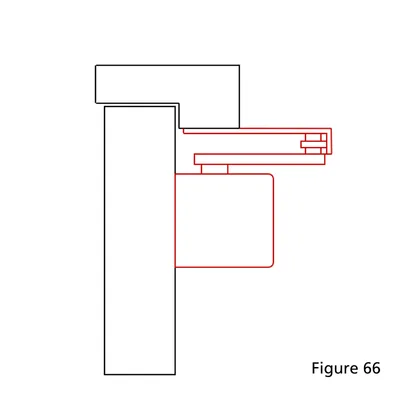
Figure 66
If a closer can’t be fitted on the pull side of a door, most types can be fitted on the ‘push’ face instead. This generally involves using a ‘Figure 66 Bracket’ which is an L shaped bracket mounted to the door lining. The closer arms fix to this and lie parallel to the door face. It should be borne in mind that mounting a door closer in this configuration can effectively lower the power size by 1, as the arm has less leverage in this position. If you intend to mount a door closer in this way, make sure that the bracket to enable this is included with the unit.
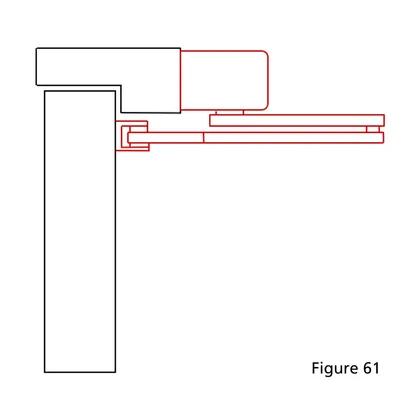
Figure 61
This is known as the Transom mounting position, and involves fitting the door closer ‘upside down’ on the door frame with the arms beneath the body and attached to the door. This is normally only possible to do on the push side of the door and might be a desirable installation if you only have a very small top rail. However, not all closers are fire tested in this configuration, so do check the fire certificate before proceeding. Also be aware that if the frame reveal is too deep the arm may not be long enough to fix to the door and operate effectively.